ΙΚΑRUS: THE ULTIMATE CHALLENGE

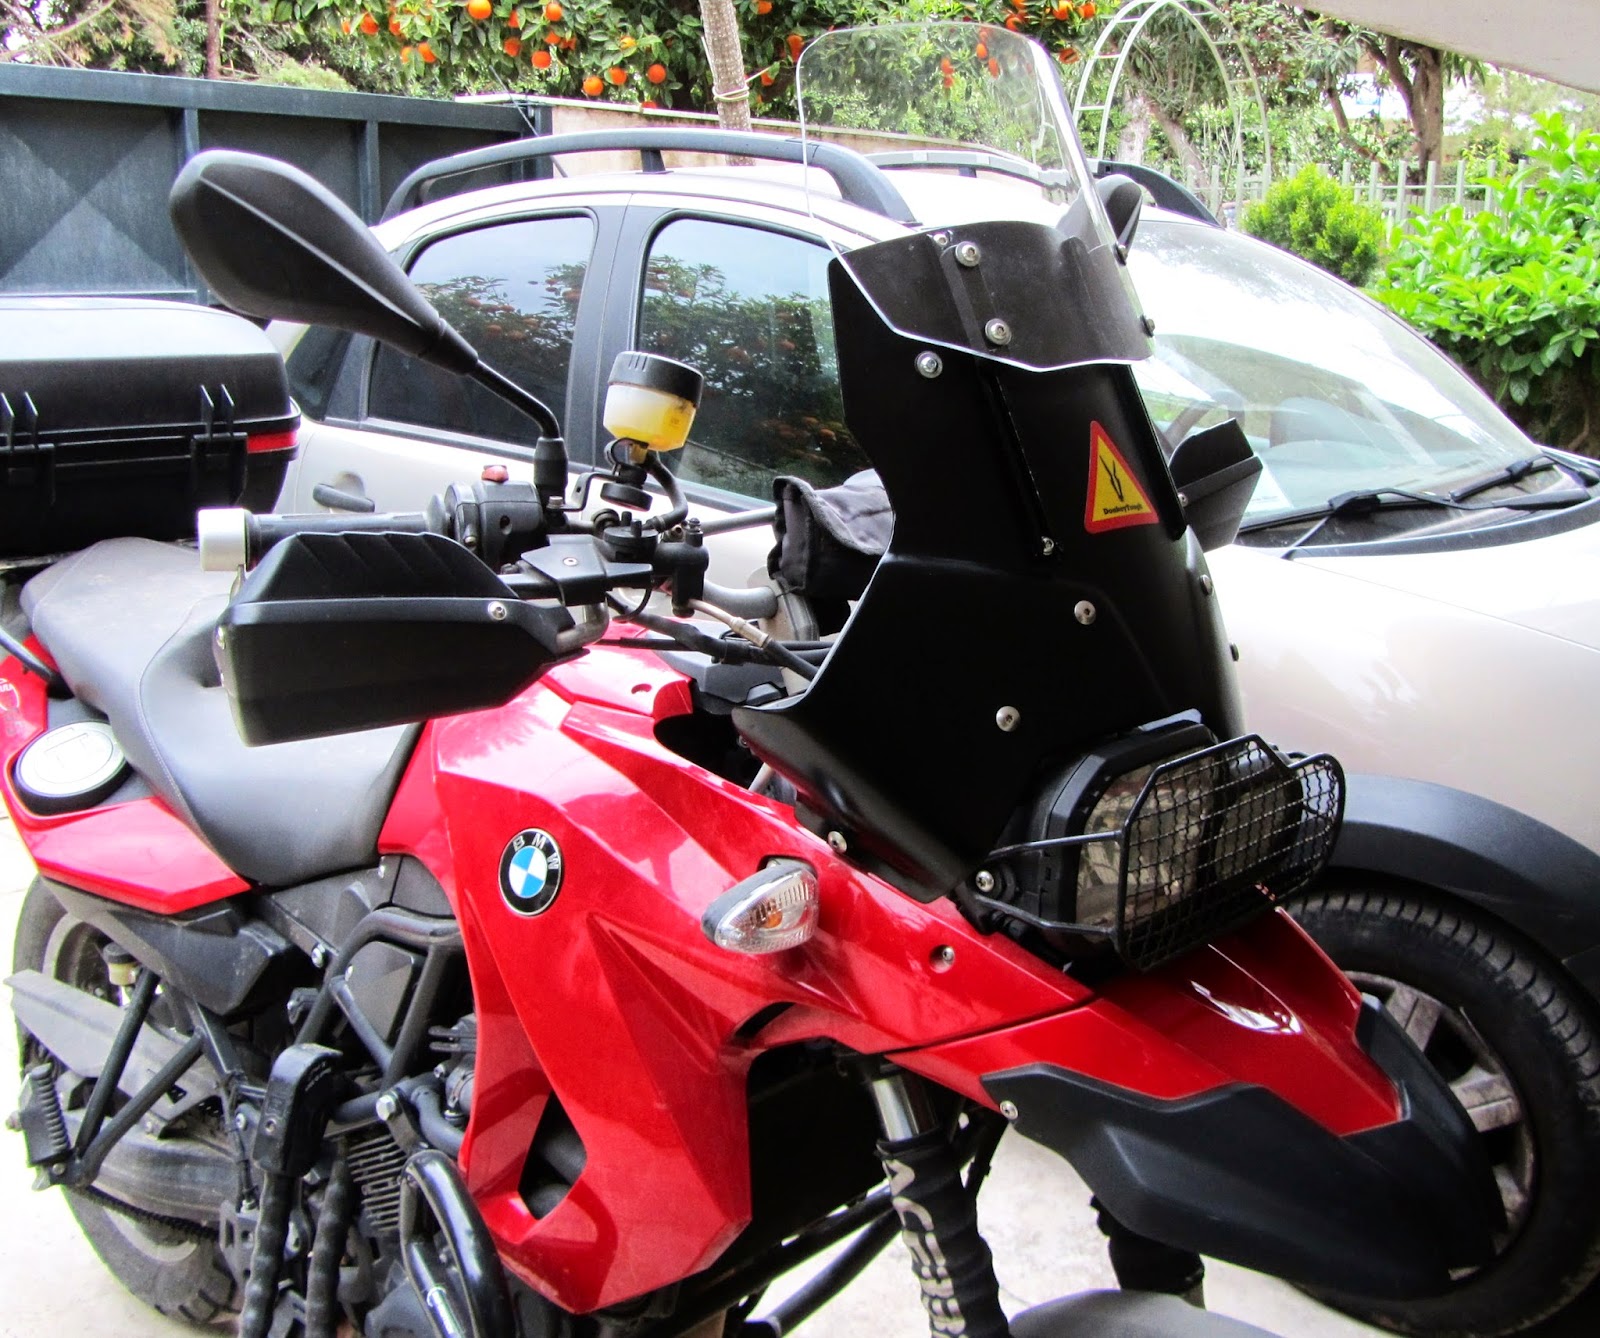
And then it was time for some hardcase senario testing. A guy tested my fairing and liked it BUT it was a little bit on the sort side for him. To be exact the owner of the beautiful Lava Orange F 800 GS is 195 centimetres high and he had tried many fairings in the market with no smiles. His Ikarus had to go a liiiiiittle bit higher. So back to the shed I was...

For starters I build him another kind of plexiglass screen. The main profile fitted the one of the black base but it was almost 10 centimetres higher. I had to work with a bigger plexiglass piece and it was a tough one as it almost didn't fit in my oven and it could easily get burned, touching its walls. But it cooked nicely -no crisp ends- no melted plastics in the oven! Then I build some longer spacers and racks, so that the bigger screen would have better stability and more air passing between it and the base (black) screen. I guessed that otherwise it would have more vibrations as its center of gravity is higher and its heavier, and its bigger surface would have more resistance to the air stream. Of course now the top end is higher but so is the head of the rider, and we agreed it would be safe in any case.

I also formed a support bar with different angles so it would surely hold on to the extra stress, but one that could be more easily bolt on and off to the motorcycle. I 've made a support bar for my bike that was rock solid but being bolted to the rear bolts of the instrument and lights bmw plastic subframe, it would be a pain for the guys at bmw service to work -assuming they could find the way to unbolt it if needed- so we went another way. I tried to follow the angles and curves of the Bmw turing screen support bar. It wasn't easy but after some cursing and aluminum throwing away it came up nicely. I also found some heavy duty P clips to bolt it on the base with good quality rubber covers. It is stable but the vibrations -that used to make my gps screen tremble- are gone.

The Lava Orange Princess insisted -as if things were not hard enough already- that it wanted his front total black. So I had to paint the aluminum bars without having the ability to powder coat. So I painted them with a simple small brush and when they dried I coverde them with a layer of epoxy resin. They seem ok, but I don't know if and how long they will stay that way. But we can always repaint them. As everything on the built. Oh and playing with mat black spray paint I got a finish close to the look of our bikes black plastics (beaks end, hand protectors, air intakes etc).
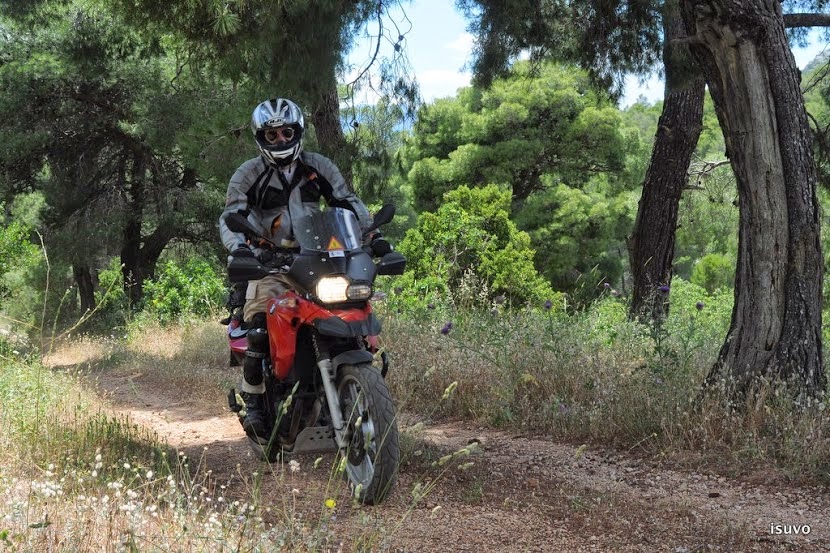
...so it was time for... TESTING-TESTING:
 Take 4 (and last?)
Motorcycle: BMW F 800 GS
Rider's height: 1,95 cm
Helmet: HJC HQ1-LORDSHIP CARBON
Wind: Moderate (4 on the Bofors scale
Screen's max height: 50+ cm
Test field: Athens to Lamia National Road
Drivers notes: Air flow is on top of his helmet. He body is fully covered from air stream. Can ride with the helmet screen open up to 180 klm/hour. His previous screen was a Bmw touring so he had to go there... There is a small air flow bellow his armpits, no serious vibrations. He only got the screen to slightly tremble, up to high speed with the wind on his side. No buffeting noise, as the wind noise is reduced, he can hear the motors sound for the first time...
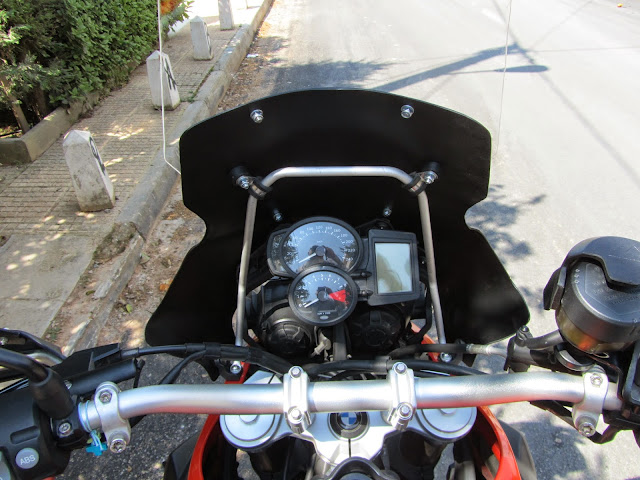
My results: Ikarus works. On is basic form you cat ride up to 180 klm/hour comfortably, without buffeting, noise, or vibrations. You can have your helmet visor open up to 130 -depending on wind speed and direction- and generally a rider of a hight up to 180 cm can have a decent coverage almost up to the bikes top speed. Its aerodynamic is decent, as it doesn't seem to slow the bike down on acceleration, or increase its fuel consumption. With the clear screen down on its lower point you can get to ride off road without hitting it, no matter how low you bent your body. Gps mounting is good as you need a slight lower of your line of sight to have the gps on its center. It also covers the gps from the rain sufficiently.

Built-wise: Ok, it wasn't easy. You have to learn how to work with epoxy resin and aeroglass cloth(or fiberglass), hand bending of aluminum tubes -without denting them, on the last farting curve forchristshake!- and thermoforming of straight common plexiglass sheet, cutting it drilling it (without cracking it at the end...). BUT neither the cost of raw materials nor the ...learning curve are punishing if you want to try it.
You won't need any special tools. Most "exotic" things you should buy is a cheap heat gun and a tube bending hand tool (to the dimensions of the tubes you gonna use), and -assuming you have a drill and a dremel-like thing- you 'll be set to go. There is going to be a lot of sanding though, but you can do it by hand. If you are going to buy a tool for the job, make sure its the most maneuverable you can buy and has a small head that can fit in inner corners.
Overall is a fun procedure ideal for a winter hobby, and by starting around October you can surely have your new fairing ready by the time the weather clears again for riding. The key ingredient in the mix is free time and ...persistence.
"So why so few solutions in the market?"
Manhours are expensive. Skilled manhours that is. That is the main reason we don't see a thing like that as a kit from any big companies that produce after market motorcycle stuff. They big majority of them prefer compact one piece plexiglass solutions that can be made almost automatically, with industrial mass production and have a great profit margin. But plexiglass as a base would break when epoxy won't.
Then you got the prince Desierto from Touratech, which is made as a big metal esoskeleton and then covered with cheap plastic. My guess is because that way they can mass built it cheap -either inhouse, especially the metal parts, or outsource them- and then control assembly.
Most interesting thing I saw researching my project is the Mirage by Britannia Composites. But I wasn't able to get one on my hands and play with it. Its has a really clever -back to basics- approach to the subject and is cheaper than the Touratech part. Come to think of it its only natural as the company is smaller and focused on fairings, so has invested time and money on getting good with plastic. They use cheaper plastic (fiberglass front /abs back I think) that the epoxy resin I chose and the make for it by adding a cheap/strong metal part to reinforce it. Which is fine but I guess the thing would be heavy. And it requires the instruments to get off the bike to install it and then bolt them on it. But provides a good area for switches and gps and a good shelter for ballast set-ups under it.
Anyway I will have to give you a more detailed report of all the screens I have tried on my bike or on friend's bikes in my next blog post.
Bottom line: If you gonna try something like that you need epoxy cause it provides a good, solid yet durable to stress/vibrations base that looks good. Ok it is more expensive than fiberglass (6 times more I think) but the total built was hands down cheaper than a Desierto or a Mirage. And fun.


 Take 4 (and last?)
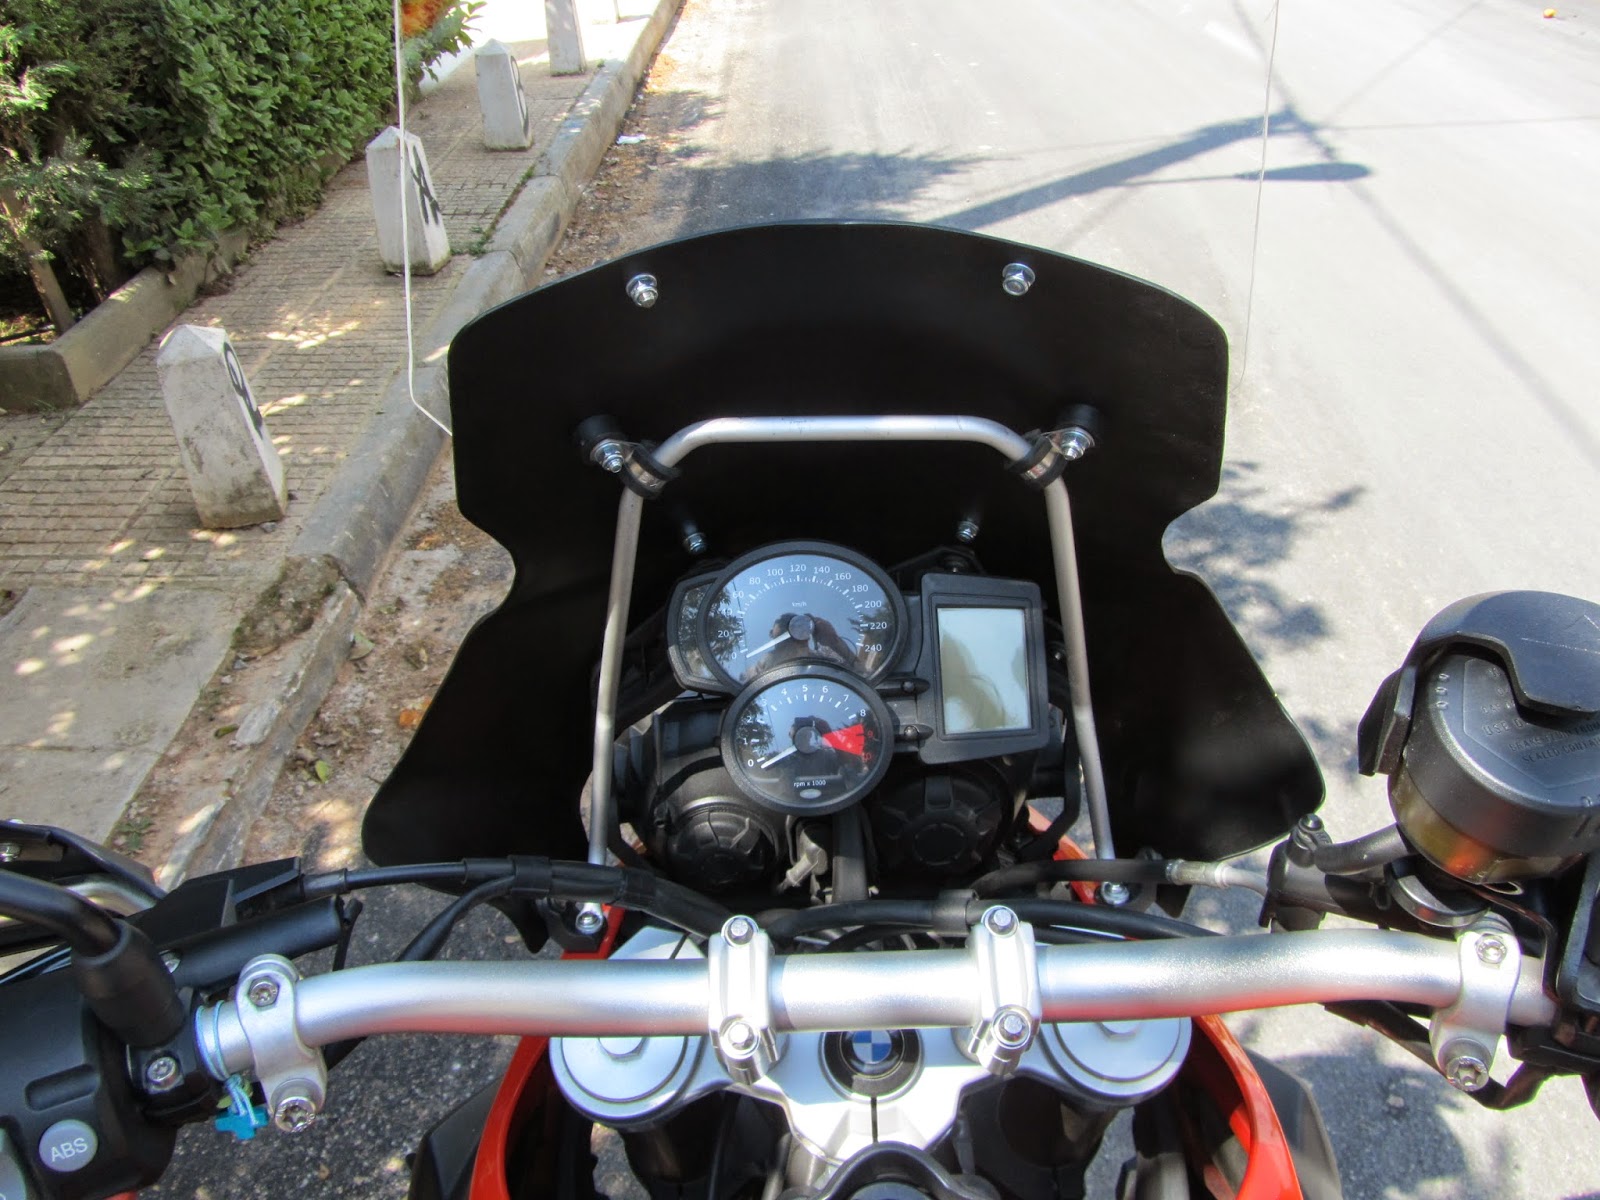


 Take One:


