This is a record of the effort to built a fairing of variable height for a BMW F 650/800 GS bike model, with materials that can be easily bought out in any market. The main target is to built a variable height adventure fairing, with out special tools or exotic materials and the end product to be cheaper -at least to materials- to the ones the "adventure" motorcycle after market has to offer. But foremost it has to work aerodynamically better than most of the available screens out there, that I tested out and found pretty disappointing. Or just hilariously expensive to buy. A very good starting point though...
Phase One: The Mold
I took the screen that seemed to work better with the wind and has the simplest form and make a polyester mold of it. I chose polyester only because it was the cheapest material I could find. My mold took 4 layers of polyester soaked fiberglass, of the cheapest industrial type, you can find in any hardware store. I applied them to my old screen after I coated it with 4 layers of PVA fluid, so that it wouldn't stick on it permanently. And this what I got! Not bad for a first timer...
Attention: Polyester contains styrene that is harmful, linked to cancer, toxic poisoning, irritating to skin, eyes and lungs, and especially nasty to your brain. So use a proper mask, goggles, gloves, cover your skin, making sure you do it in a well ventilated area, while using it.

I marked the shape of the original screen on it and started taking measurements of other screens (height, width, mounting holes etc) and then I cut it. On the left side image you can see marks for the various heights of other screens, on 27 cm (BMW F650GS), 30cm, 33cm (BMW F800GS), MRA screen, Givi etc I decided not to limit his height so that I could try building base fairing parts in different heights in the future.

Phase Two: The base of the screen

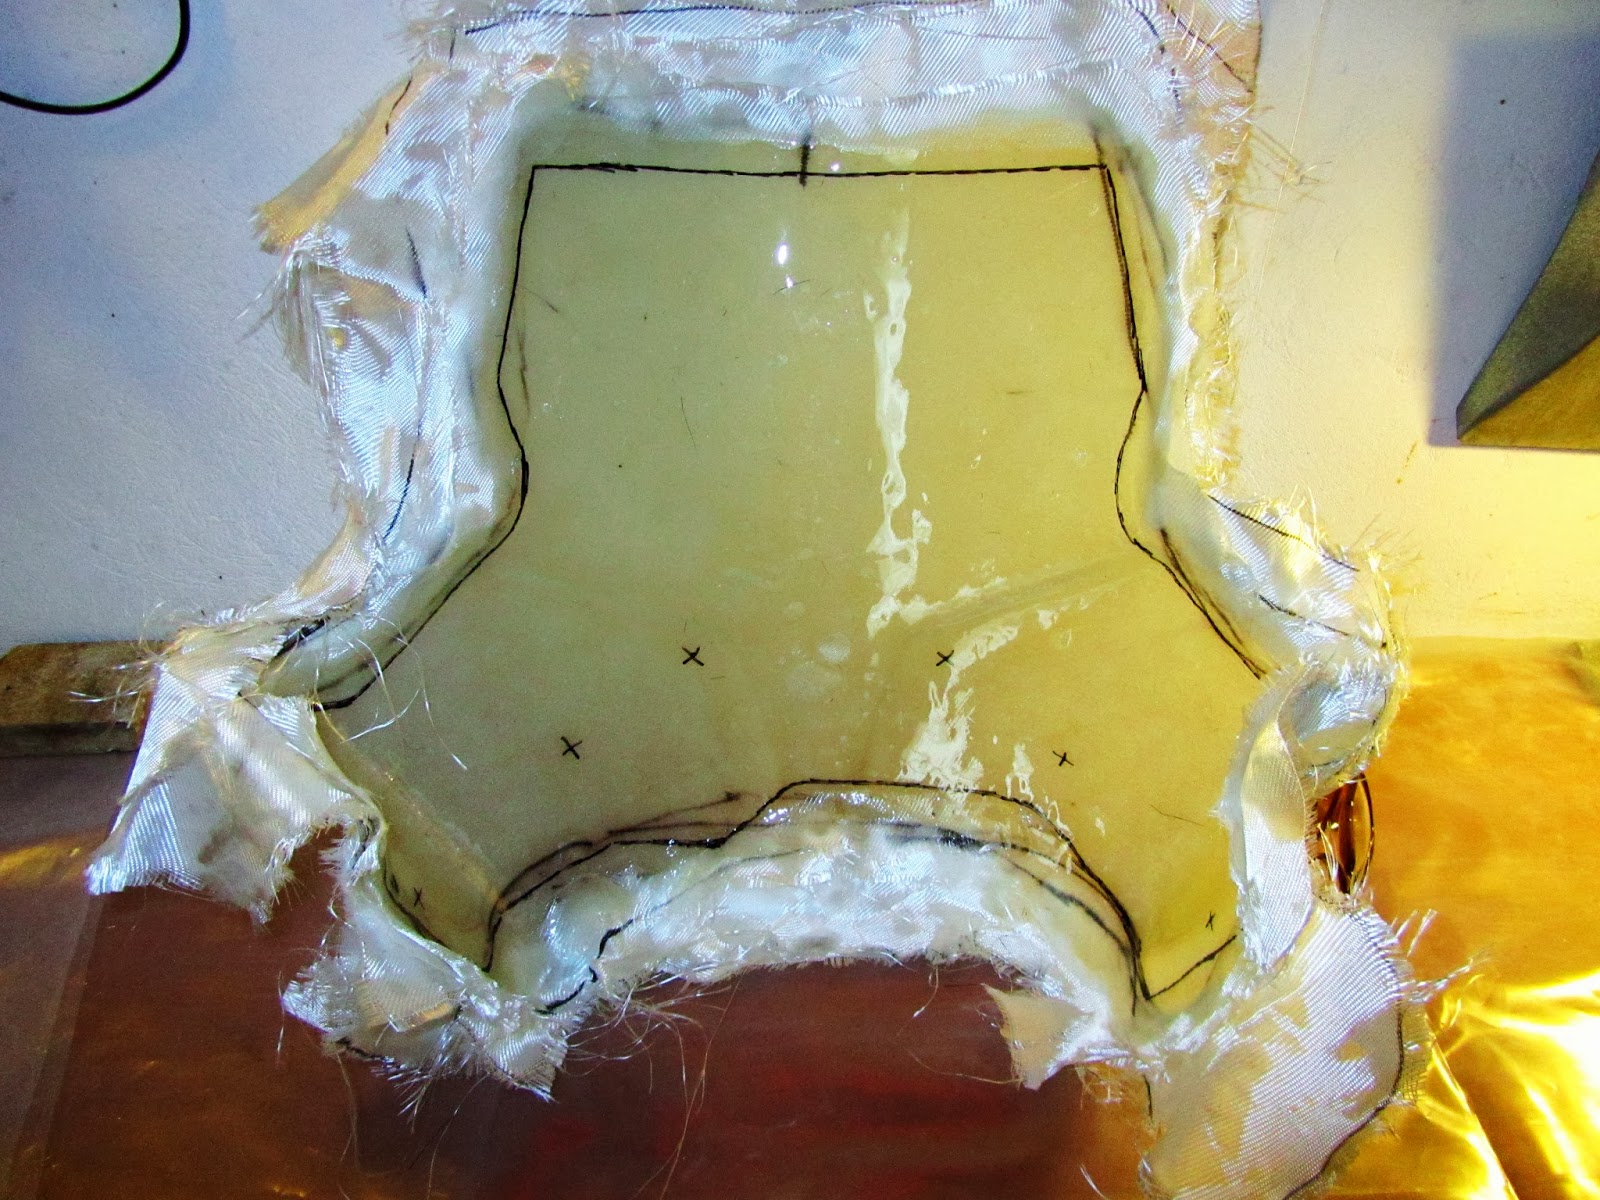
I apply 6 layers of PVA on my mold and wait for it to dry. Then I start covering it with epoxy resin, then covering the resin -as soon as it gets sticky- with aeroglass fabric. Its a cloth similar to fiberglass but its more structurally woven and it can vary to weight and thickness, giving your build either extra strength per layer or easy conformity to shapes, and smooth finishing. Usually you find best to use heavy and thick aeroglass for the first layers and thinner ones for the outer ones. You repeat the resin-layer tango and then you wait for it to cure for some days.

Although epoxy is not as harmful as polyester (and not so stinky!), it is important to take precautions. It is also a big deal that you work in an environment with around 60-70% humidity and with a temperature from 20 to 30 degrees Celsium, if you want to avoid any surprises.
Six or more layers later the mold looks like this. The white cloth around it is the aeroglass. I always cut it bigger cause the sticky epoxy resin won't give you many chances to put it on wrong, as I found out with cursing out loud frustration!
As online resin mentor Ebrabaek (thanks again) described it you should think flypaper spread when you apply the cloth. But he never mentioned me being the fly, stuck with an epoxy filled trap on me!
Phase Three: Unleashing the beast
The black marker transfers the dimensions I chose to the epoxy piece, just before I carefully but sometimes with brute force- detach from the mold, trying dot to destroy any of them. Small wooden or rubber inserts are very helpful at this stage. My dremel tool cuts away the outer material. So from this:
We get to this, after much fiddling, with varius washing and scrubbing devices. Must admit this feels like watching a sculptor releasing a form out of raw marble block...


So far the result is pretty encouraging. The piece I got on hand has a good solid texture, seems extremely strong for a plastic flimsy thing and it weights like a feather, compared to the after market screens. But I will weight it at the end of the process.

Phase Four: Fitting On the Bike


Nice! Now a last thin layer of epoxy resin to make it extra smooth. And then we pop a beer can open, sit back and wait for the resin to settle...
 Ah yes the finish... At some point you realize that the sanding painting sanding procedure can go on forever like a mandra. It soothes the mind but you loose track of the build. And the point is to see if this thing works with the bike and the wind. So mat black it is and on to the bike. You can always repaint, which by Merphy's old law will be needed if you finish it to perfection and then test it as a tool will slip and scratch the hell out of the paint. So:


Phase Six: Epoxy and Plexiglass -The Mariage


I already feel that I need some kind of spacers to increase the distance between the black base and the plexiglass. Around 3cm high. I study the best fairings around, talk to people, and read some basics on aerodynamics. From what I 've read the airflow between the two surfaces has to equalize the air subpressure behind the screen. Otherwise the negative balance of air presure behind the screen, with that in front of it, will cause the air pocket to collapse, ruin aerodynamics, and minimize the cover from the air. Will see...

And for those of us that get a kick out of numbers... So far we got: Total weight 1060 gr!
This is 100 grams less than a plexiglass screen in the same size! Thanks to epoxy, the heaviest part on the set are the bolts. Then the heavy part is the plexiglass. Should I go with 3mm thickness? Will see, but keep it as a mental note. At the same time the epoxy part is the strongest with maximum thickness less than 3 mm!


 Next check, interfearance with bike's controls. Yeap thw bike turns full lock on either side without meeting the steering bar, the hand guards or anything else. Big deal?
I would'n think of it as such, until I tested a screen -of a famous adventure brand- that on full lock to the left (yes the locking side...) the steering bar was hitting the screen. Go figure...


Phase Five: Cut Once, but count Twice...
Or when try to measure precisely on 3D curved objects can lead you to insanity! Especially on things partially asymmetrical like the F800GS face! The lines can seem wring but count right alla the time as the curves contrasted by the straight but uneven openings for the asymmetrical lights can easily fool the eye. Anyway where were we?


I bought a piece of clear 4mm thick plexiglass, heat bend it, cut it sanded it and sand it to follow the curve of the base.

Phase Six: Epoxy and Plexiglass -The Mariage

Things go tough here as there are a zillion ways to get the one on top of the other, but I need something cheap strong and practical. So its shopping time again and back to the hardware store we go! I needed something cheap that holds but won't rust. So I picked up some aluminum curtain rails and some square profile aluminum tubes. I trimmed some nuts to slide inside the rails, so that the bolts could tight on them and the rails at whatever length I wish.

Allen head screws, and although I thought to go with thump nuts, as some screen makers choose, the idea of someone unbolting them as they see him upfront there, and take the screen, even "for fun", made me reconsider. Who would take a plexisglass screen just for fun? Well I know a few people myself... Anyway with just an allen No 4, I can adjust the height of my screen for now. Which is easy turned with the torx 25 on the bike's toolkit under the seat.

And for those of us that get a kick out of numbers... So far we got: Total weight 1060 gr!
This is 100 grams less than a plexiglass screen in the same size! Thanks to epoxy, the heaviest part on the set are the bolts. Then the heavy part is the plexiglass. Should I go with 3mm thickness? Will see, but keep it as a mental note. At the same time the epoxy part is the strongest with maximum thickness less than 3 mm!

Phase Seven: On the bike
With the upper screen on its lowest point, we got 33cm from the upper headlight edge. For reference the total height of the F800GS original is 27cm.
Upper screen fully deployed: 45.5 cm.

Maximum width at the base 46 cm. Maximum width of upper screen at the top of it 31 cm.


Yes, it works! At least with the bike still it can travel freely up and down with two turns of the bolts. With mo extra pressure. With just one hand. And with motorcycle gloves on.

I would'n think of it as such, until I tested a screen -of a famous adventure brand- that on full lock to the left (yes the locking side...) the steering bar was hitting the screen. Go figure...


On our next episode: TAKE THE MF THING ON THE ROAD ALREADY!
Oh, and test it with strong winds, on high speed, on rough terrain, and Oh, oh a gps mount, definitely a gps mount on it... and what about that bars they kind of kill the cool of the entire built... Will see...
No comments:
Post a Comment